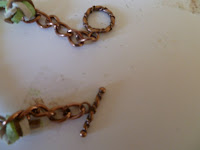
Recently, I've been into a new interest in making bracelets. There are many versions on making a simple braided bracelet but since I made one today, I decided why not share my interpretation.
Materials:
Needle Nose Pliers
 Scissors
Chain
Closure
Suede Cording
A) Take three of the suede cords and wrap them around your wrist once and cut the cords at the end.
B) Use the needle nose pliers to detach two separate 5-6 long peice chains.
C) Place the three cords though one of the chain pieces and tie a knot to secure it in place.
D) Tape the ends of the cords down and begin braiding the cords. Be sure to make the braids as tight as possible.
E) Once you have finished braiding, place the ends into another one of the chain pieces and tie a knot to secure your braid.
F) Then use the pair of scissors to cut any extra cord following the knot.
G) Use the needle nose pliers to open the end of each chain and attach a closure onto each side.
Now that I have successfully completed a DIY project, I am off to find another to complete. I can definitely sense that this will become a new obsession of mine, so I will probably be making a lot more bracelets and layering them all on my arm for the next couple of months.
xoxo,
Nickel


No comments:
Post a Comment